Editing Photos with Lightroom
Import, adjust, export. Turn a flat RAW file into the photo you actually saw.
We learn Lightroom in small steps, every Tuesday. Today: import, the Light and Color panels, and export. From now on, you edit every Weekly Mission here.
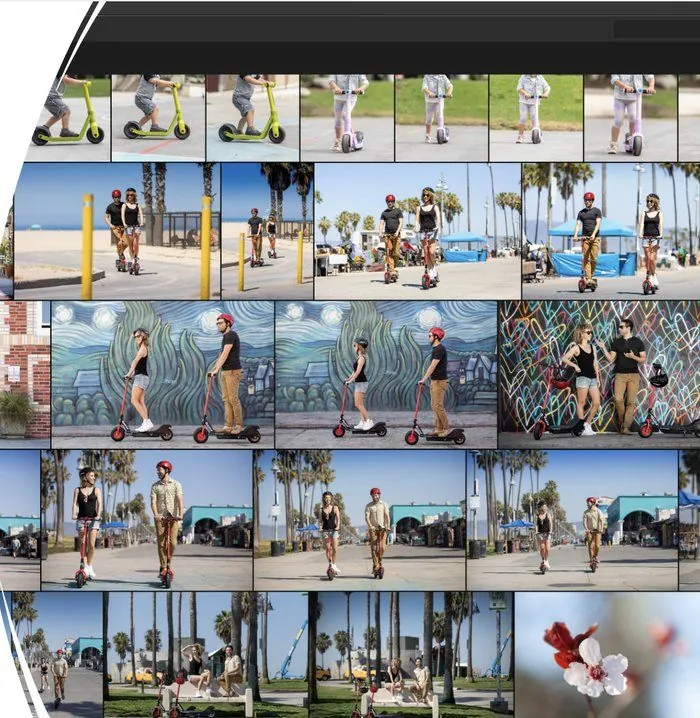
START HEREOpen your unit one-sheetPrint it or keep it open while you work.Open ↗Importing just means bringing your photos into Lightroom's library so it can start tracking your edits. Open Lightroom, click Import, choose the folder holding your JPGs or RAW files, and pick which ones to bring in. It's worth organizing photos into folders or collections as you go, once a shoot has more than a handful of images, "just scroll and find it" stops working fast.
A batch of photos ready to import, Lightroom will track every edit you make to each one separately.
Light sliders control brightness and contrast. Exposure brightens or darkens the whole image; Contrast pushes darks darker and lights lighter. Highlights and Shadows recover detail hiding in the brightest and darkest parts of the photo, this is usually where a "blown out" sky or a too-dark face gets rescued. Whites and Blacks set the very top and bottom of the range for extra punch. Small moves here do most of the work; a photo rarely needs Exposure pushed past a small nudge.
The Light panel, reset to zero, every slider here starts flat and moves from there.
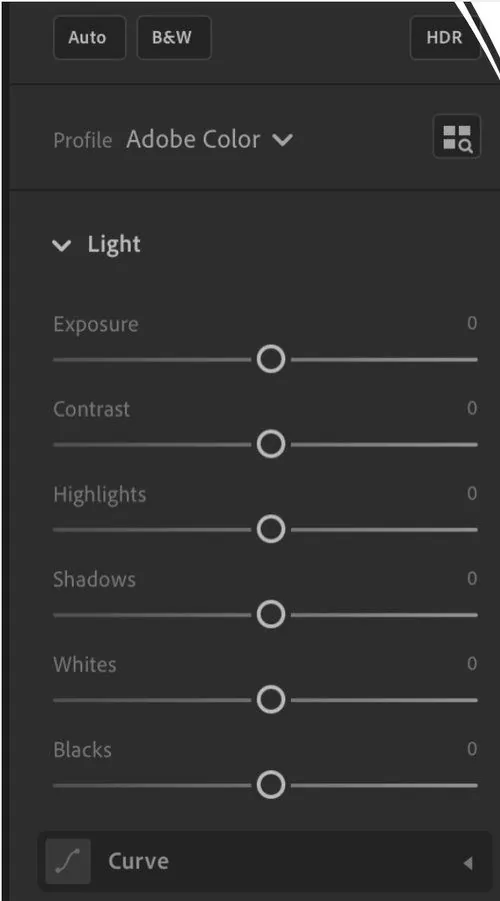
Whole photo brighter or darker
Gap between darks and lights
Brings back bright skies
Opens up dark areas
Sets the very brightest point
Sets the very darkest point
White Balance (Temp and Tint) fixes color casts, a photo shot indoors under warm bulbs often needs to be cooled down, and vice versa. Vibrance boosts the muted colors in a photo without oversaturating the ones that are already strong, which is why it's usually the safer choice over Saturation, which pushes every color up at once and can look artificial fast.
The Color panel, White Balance, Vibrance, and Saturation.
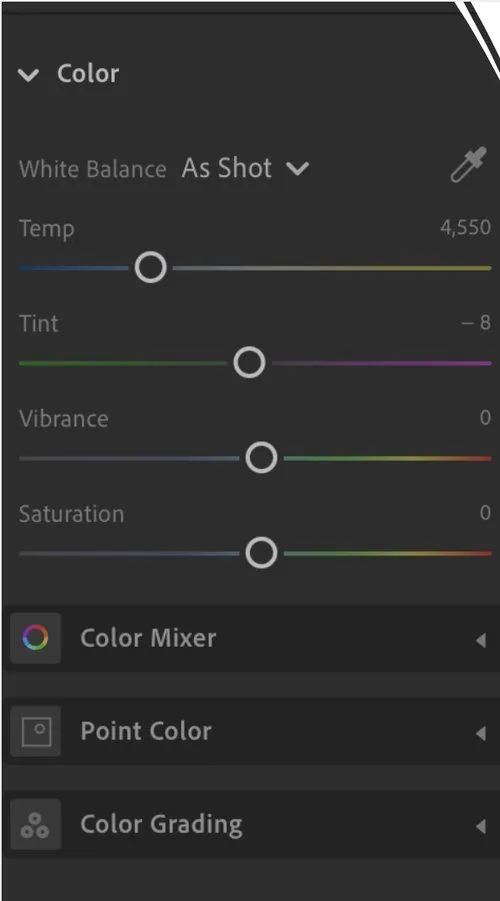
Cooler blue or warmer yellow
Green or magenta cast
Lifts dull colors gently
Lifts every color at once
Effects are where a photo gets its personality. Texture and Clarity sharpen or soften fine detail and midtone contrast. Dehaze cuts through fog or haze for a crisper look. Vignette darkens the edges of the frame to pull the eye toward the center, and Grain adds a bit of texture back in for a film-like feel. These are finishing touches, apply them last, after Light and Color are already where you want them.
The Effects panel, Texture, Clarity, Dehaze, Vignette, and Grain.
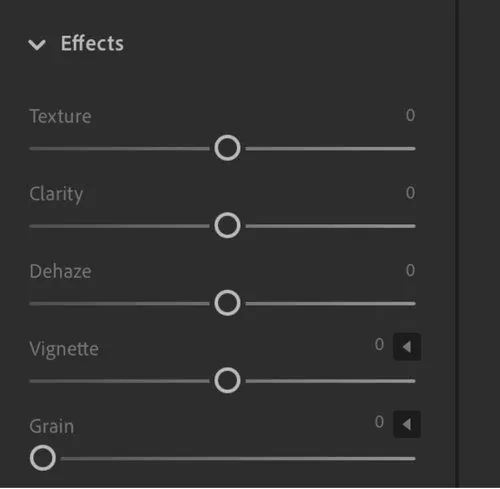
Fine detail like skin and fabric
Midtone punch
Cuts fog and haze
Darkens the edges
Film‑like texture
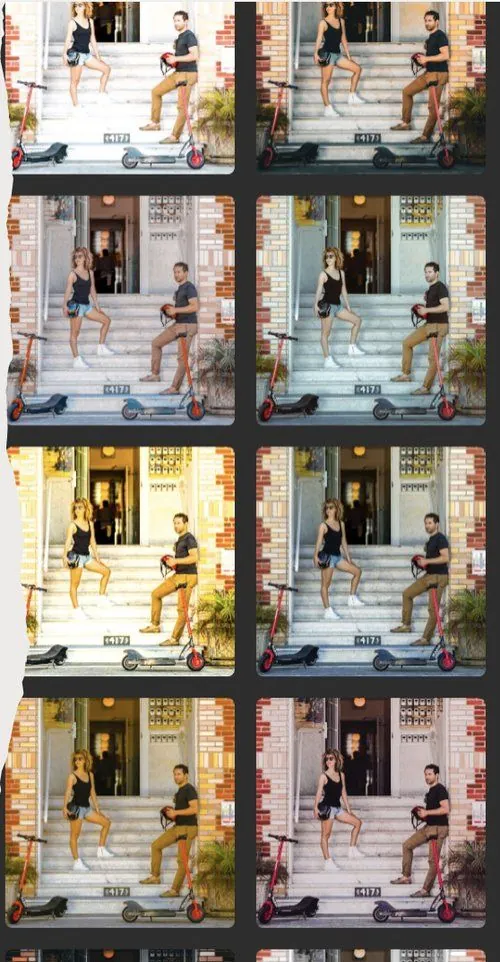
A Preset is a saved bundle of edits you can apply to any photo in one click, a fast starting point you then fine-tune by hand. A Version saves a particular edit of a photo without touching the original, so you can try a black-and-white look, a warm look, and a punchy color look on the exact same file and keep all three. Neither one is permanent or destructive, you can always go back to the untouched original.
The same photo, saved as several different Versions, each one built from a different Preset.
This cherry blossom photo was shot flat and overexposed on purpose, as a JPG it would look washed out and unusable. As a RAW file, all of that detail is still there, just waiting to be recovered. Look closely at the petals: what reads as blown-out and detail-less on the left comes back with real texture, subtle color, and depth on the right, using nothing but the Light, Color, and Effects panels above.
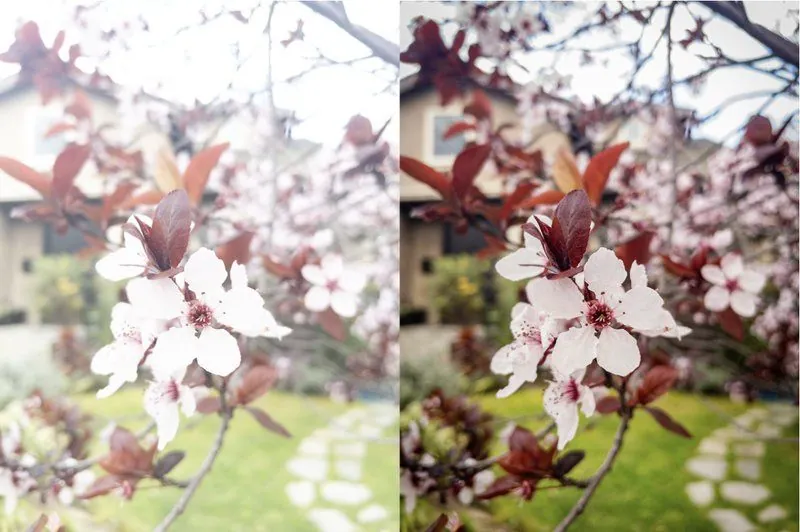
Photo by photoclass.org: untouched RAW import (left) next to the same file after a Light, Color, and Effects pass (right).
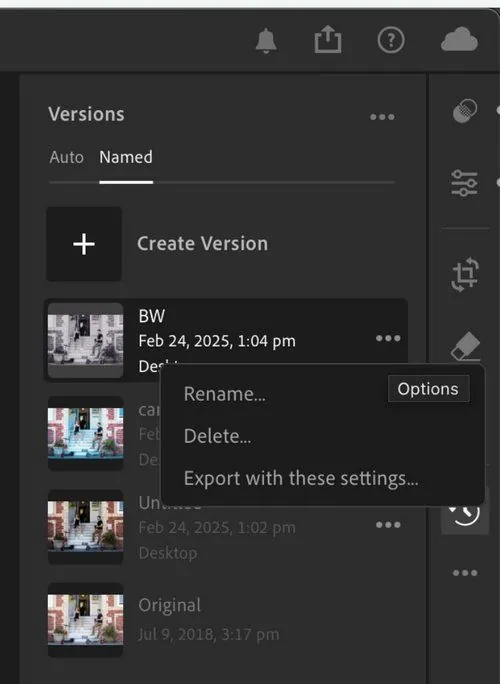
Exporting turns your edit into an actual file you can turn in, post, or print, up until this point, everything only exists inside Lightroom.
Today: put all four panels to work in the practice, editing one photo three different ways. Then edit this week's Weekly Mission the same way.
Versions panel, ready to export a specific edit.
Your assignment
Practice: One Photo, Three Ways. Ungraded, in class today, Week 4, Tuesday. Then edit this week's Weekly Mission the same way.