Unit 05 | Lesson
Photo Editing and Retouching People
Lightroom first, then Photoshop, one named layer at a time.
How this lesson works
I teach every step on Milana's portrait. Then you do the same steps on Eden's photo in the practice. Step 01 here is step 01 there, all the way to 08.
Must do
The steps that are graded.
Technique rule
How to use the tool right.
Creative goal
What good looks like.
Questions for you
Click for one question at a time.
The standard
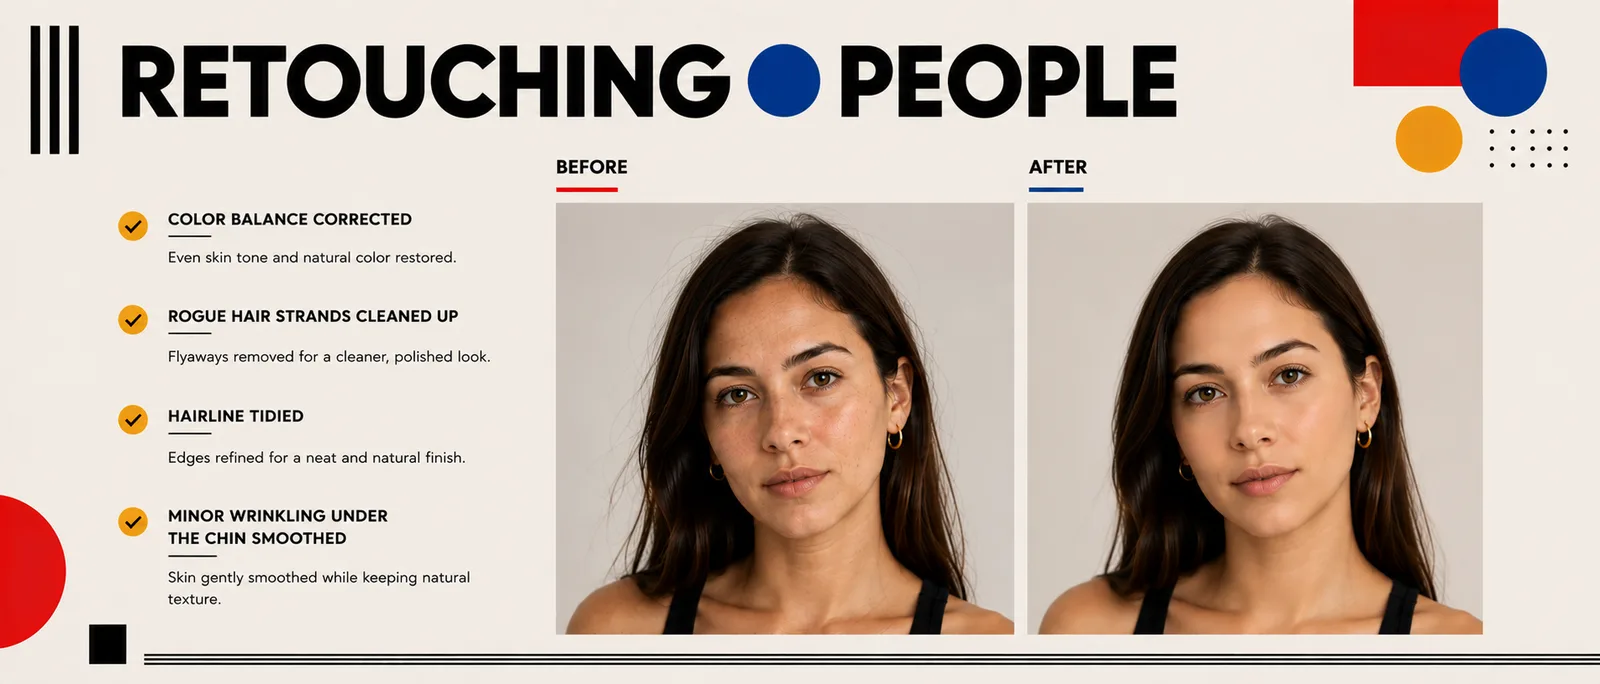
Left is Milana's RAW file, exactly as the camera captured it. Right is finished.
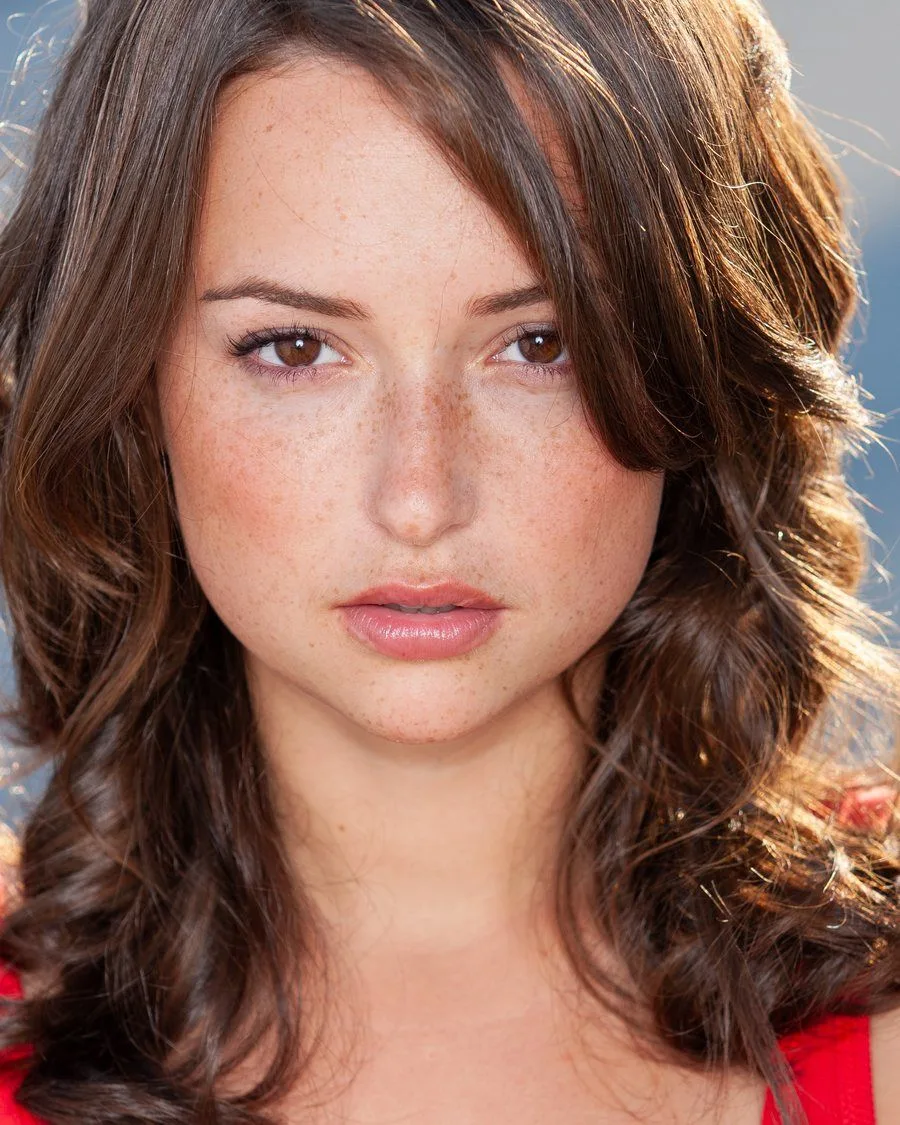
RAW, untouched
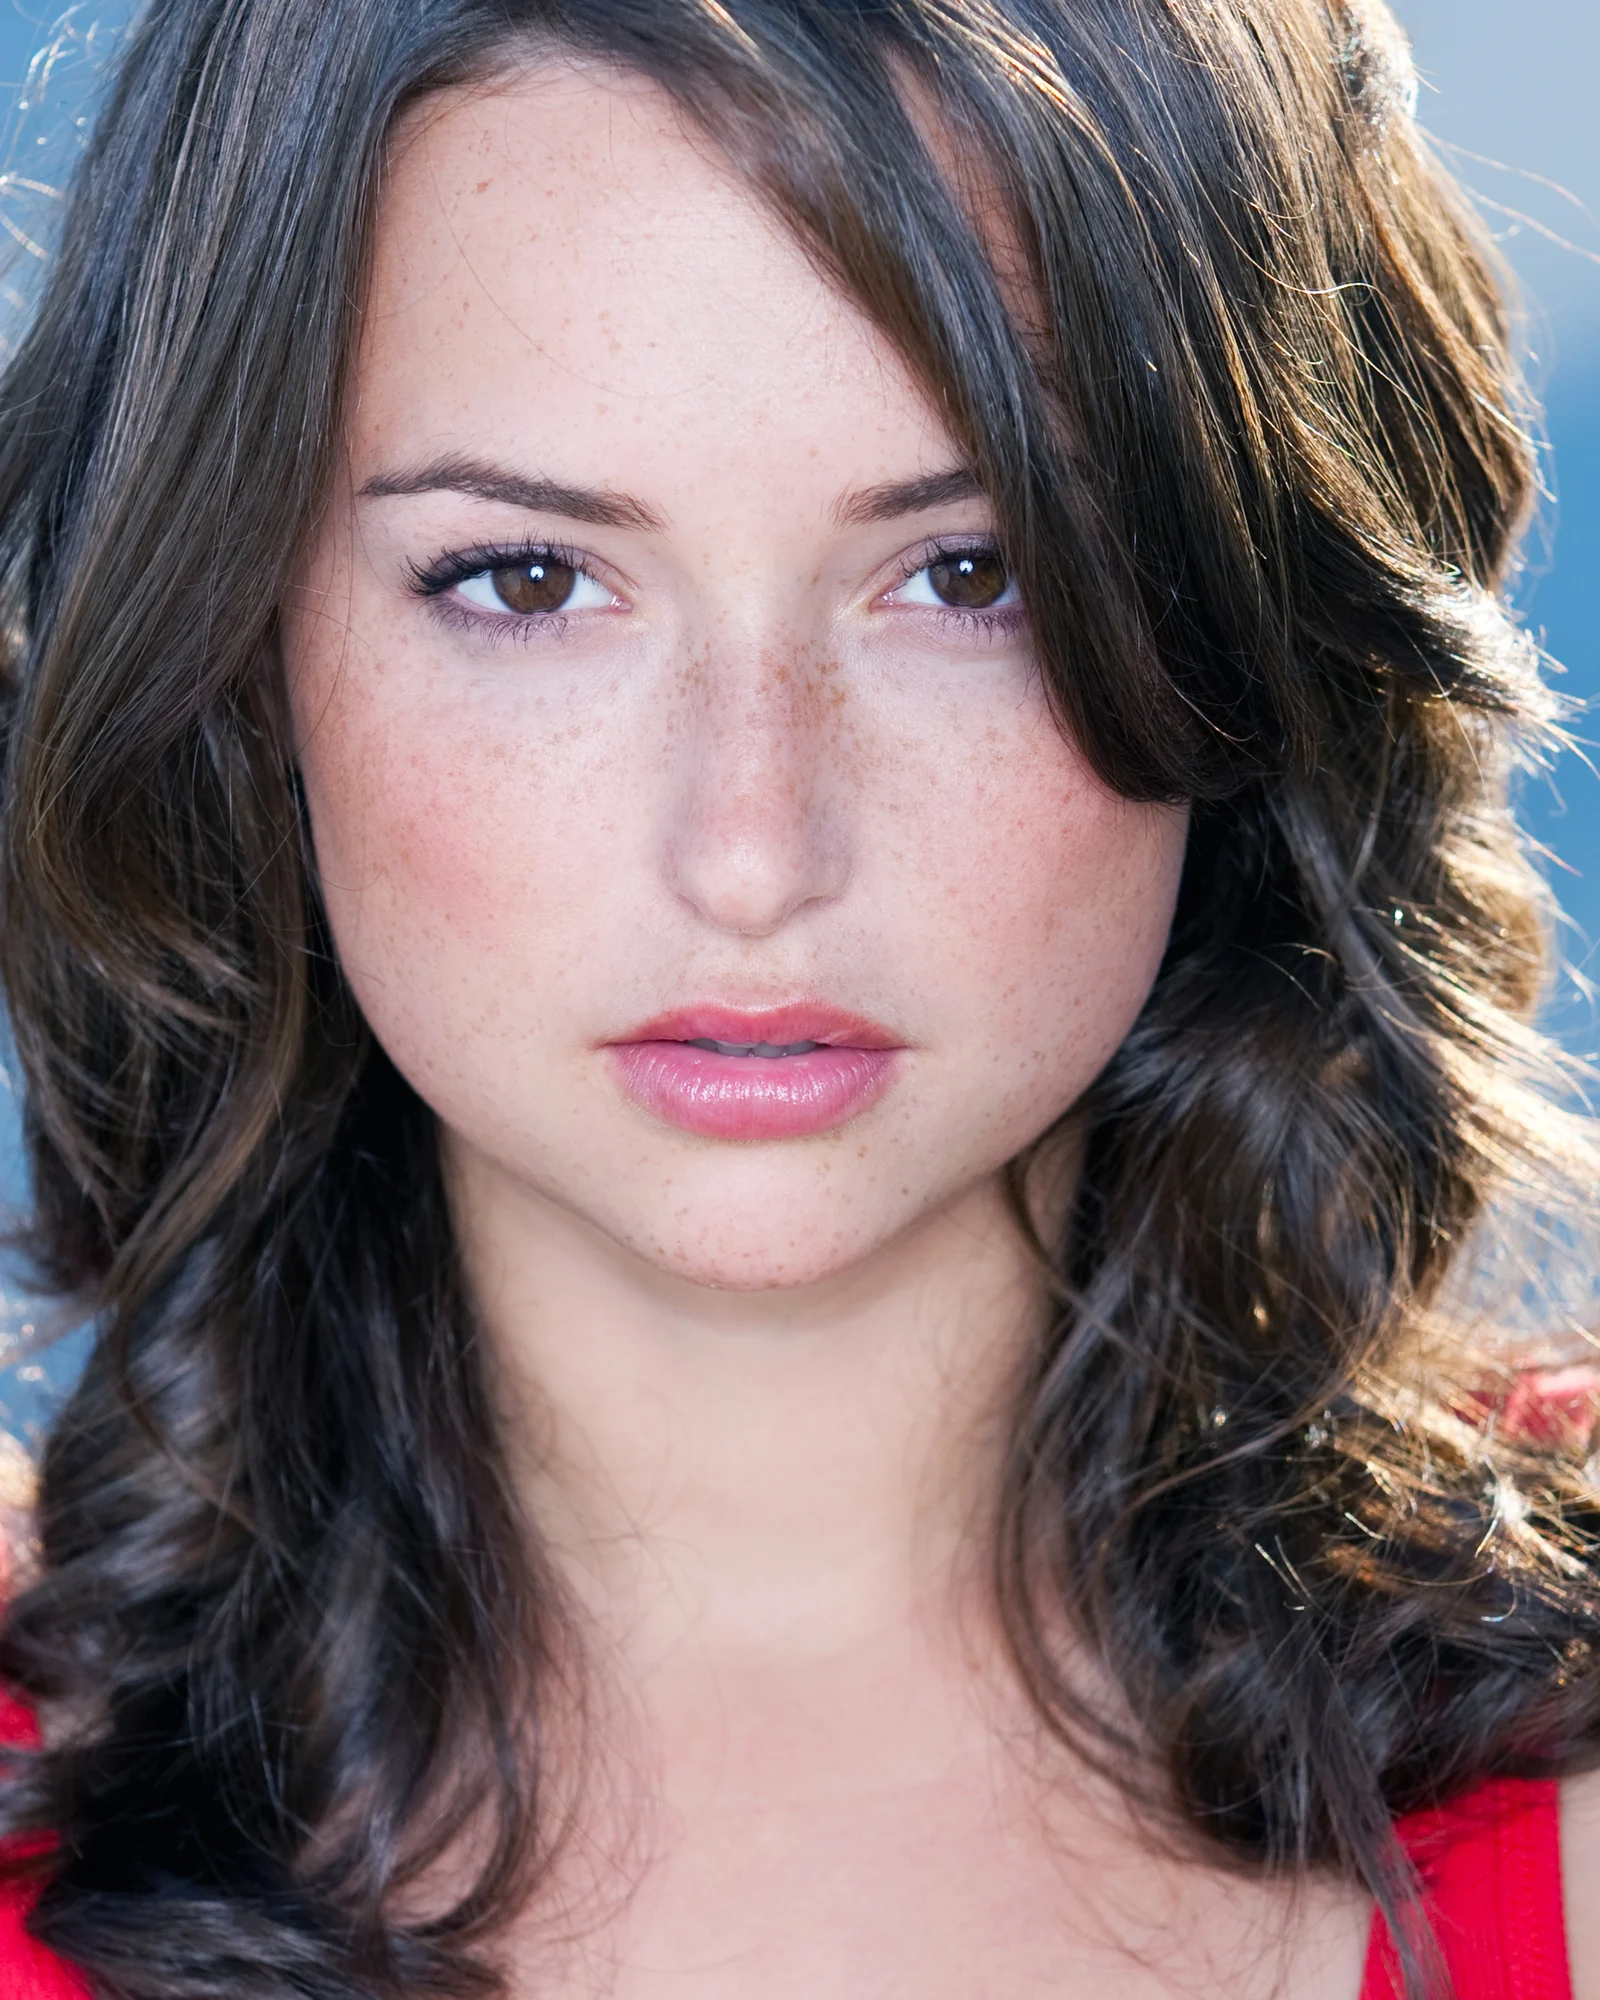
Edited and retouched
Photo by photoclass.org
What was done
✓
Color balance corrected
✓
Minor wrinkling under the chin smoothed
What was left alone
✕
The shape of their face
✕
Anything that makes them look like themselves
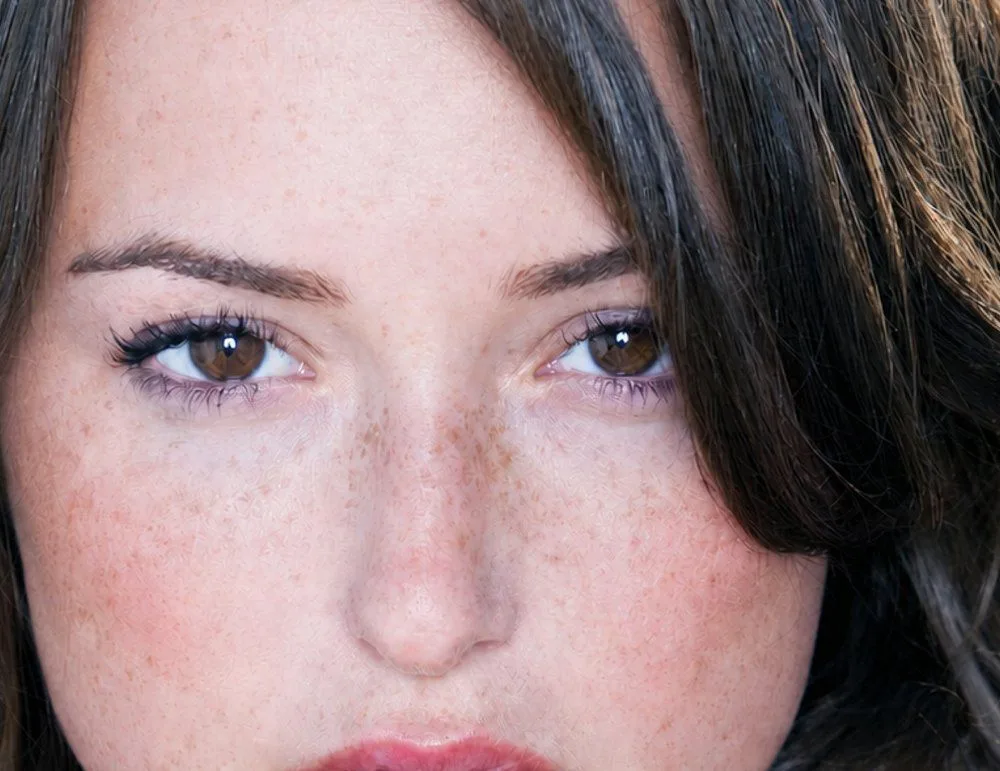
The finished file, close up. Every freckle is still there and the skin still reads as skin.
The idea
Editing is finishing a photograph, not faking one.
QUESTIONS FOR YOU, THE STANDARD
What changed between the left photo and the right?
Would they recognize themselves in the finished photo?
Step 01 in the practice
Download and save the RAW file
Your own folder, before you open it.
A RAW file is everything the sensor recorded. You can push it a long way before it breaks. A JPEG is a flattened copy with most of that information already thrown away. That is why we start from RAW.
Must do
Save the RAW file to your own folder before you open it. Never edit the original.
Before you touch a tool
Open the photo at 100% and write down every fix you can see. Then work that list in order instead of clicking around.
QUESTIONS FOR YOU, STEP 01
Which file holds more information, RAW or JPEG?
Why save the file to your own folder before you open it?
What do you do before you touch a single tool?
Step 02 in the practice
Global edit in Lightroom
The whole photo, small moves.
Editing is global
One slider moves every pixel: exposure, contrast, highlights, shadows, white balance. That is Lightroom.
Retouching is local
One problem in one place: a blemish, a stray hair, the lips. That is Photoshop.
Why both
A slider cannot fix one spot. So the whole photo first, then the details.
Must do
Global sliders only in Lightroom. Then File, Export, JPEG. That JPG is what you open in Photoshop.
Technique rule
Small moves. Orange skin or a crunchy, over-sharp look means you pushed too far.
QUESTIONS FOR YOU, STEP 02
Is fixing the white balance editing or retouching?
Is removing a stray hair editing or retouching?
Why can’t a slider fix one blemish?
What kind of file do you export from Lightroom?
Step 03 in the practice
Open it in Photoshop and protect the original
Duplicate the background, then leave it alone.
Photoshop looks busy the first time you open it. You only need three parts of it.
Tools, left
One click picks a tool. Icons with a small triangle hide more tools: click and hold.
Options, top
Changes with the tool you pick. Brush size and settings live here.
Layers, right
Where your work lives. Cannot see it? Window, then Layers.
Technique rule
Cmd+1 zooms to 100%. Cmd+0 fits the whole photo. Hold the space bar and drag to move around.
Think of layers as clear sheets stacked on top of the photo. Each retouch goes on its own sheet. The photo underneath never changes.
Layers panel
Lips saturation, painted in through a mask
Smoothing the face only, Opacity lowered
Hair Spot Healing
Skin cleanup Spot Healing
Background copy Cmd+J, your working copy
Background the original, never touched
What your Layers panel looks like when the practice is done. Newest layer on top, the original at the bottom.
Must do
Cmd+J duplicates the background. From then on the background is never touched, and every layer gets a name: double-click it to rename.
The eye
Click the eye next to a layer to hide it. Click again to compare before and after.
Mistakes
A retouch looks wrong? Delete that layer, not the photo.
QUESTIONS FOR YOU, STEP 03
Where do the settings for the tool you picked show up?
What sits at the bottom of the layer stack?
Why duplicate the background before you start?
Step 04 in the practice
Clean up the skin
Spot Healing Brush (J) on its own layer.
The band-aid icon. It covers a spot with the skin around it.
New empty layer
Cmd+Shift+N. Name it Skin cleanup.
Pick the tool
The band-aid icon, or press J.
Tick Sample All Layers
In the options bar, or the brush has nothing to copy from.
Zoom to 100%
Cmd+1. You cannot fix what you cannot see.
Size the brush
A little bigger than the spot. The [ and ] keys make it smaller and bigger.
One click per spot
Blemishes and dust.
Technique rule
One click, not scrubbing. Scrubbing smears the skin and leaves patches.
Creative goal
Freckles stay. You are removing what is temporary, not who they are.
QUESTIONS FOR YOU, STEP 04
What does the Spot Healing Brush icon look like?
Why heal on an empty layer?
How big should the brush be?
Why one click, not scrubbing?
Step 05 in the practice
Clean up the hair
Same tool, a separate layer.
New empty layer
Cmd+Shift+N. Name it Hair.
Spot Healing (J), Sample All Layers on
Same settings as step 04.
Stray hairs only
The ones crossing their face and the background, one click at a time.
Creative goal
Clean the strays, keep the shape of their hair. Do not erase hair that belongs to their style.
Step 06 in the practice
Smooth the skin
Face only, then scale it back.
Select the face
Rectangular Marquee (M). Drag a box around their face.
Copy only that area
Cmd+J puts just the face on a new layer. Name it Smoothing.
Smooth it
Filter, Neural Filters, Skin Smoothing. The first time, Photoshop downloads the filter, so give it a minute.
Scale it back
Lower the layer Opacity until the skin looks smooth but still has pores.
Why the face only?
The rest of the photo stays sharp, and the file stays smaller.
Why Opacity?
Opacity is a volume knob for the whole layer. 100% is full strength, 0% is off.
Creative goal
Real skin has texture. At 100% zoom you should still see pores. If they look like a doll, lower the Opacity.
QUESTIONS FOR YOU, STEP 06
Why copy only the face to a new layer?
What does lowering the Opacity do?
How can you tell the smoothing went too far?
Step 07 in the practice
Enhance the lips
Saturation, an inverted mask, painted in by hand.
This is the most important new skill in the unit. A mask decides where an effect shows, and you paint it in by hand.
Select and copy the lips
Lasso (L) loosely around the lips, then Cmd+J. Name the layer Lips.
Add saturation
Image, Adjustments, Hue/Saturation. Raise Saturation. It will look too strong for now.
Add a mask
The rectangle with a circle in it, at the bottom of the Layers panel.
Invert the mask
Cmd+I turns the mask black. The effect disappears.
Paint it back in
Brush (B), soft, white, opacity about 20%. Paint over the lips, a little at a time.
Fine-tune
Move the layer Opacity slider until the color looks natural.
Technique rule
Painted outside the lip line? Press X to switch to black and paint it away. Nothing is lost.
QUESTIONS FOR YOU, STEP 07
On a mask, what does white do?
Why invert the mask before you paint?
Why paint with a soft, faint brush?
In class, not required in the practice
Dodge and burn with Levels and masks
The same masking skill as the lips. One Levels adjustment layer darkens, a second one lightens. Invert each mask to black, then paint in by hand where you want their face darker or lighter.
Step 08 in the practice
Save As a Photoshop file and submit
The .psd is the only file graded.
Must do
File, Save As, format Photoshop (.psd). Submit that file to the practice.
Why .psd?
It keeps every layer. A JPEG flattens everything, so there would be nothing to grade.
Why Save As?
Save would overwrite your JPG. Save As makes a new file.
Big file?
That is fine. If it will not upload from home, bring it to class the next day.
Where the line is
This unit teaches you to change how a person looks in a photograph. There is a line, and it is not complicated.
Leave alone
✕
The shape of their face
✕
Their freckles and skin texture
The test
Remove what is temporary. Keep what is permanent. If they would not recognize themselves, you went too far.
QUESTIONS FOR YOU, WHERE THE LINE IS
A breakout on their chin. Remove it or keep it?
Their freckles. Remove them or keep them?
Changing the shape of their nose. Yes or no?
Lightening their skin tone. Yes or no?
Your turn
Practice: Edit the Sample Portrait
The same 8 steps on Eden's photo. Download the RAW file from the practice, and submit one layered .psd.
Before you leave today
Open Eden's photo at 100% and write your fix list. That list is your plan for the practice classes.